Role-based access control
Role-based access control (RBAC) lets you decide exactly what each member of your workspace can see and do in Oneleet. Every member already has a system role that comes from their workspace and account type; with RBAC you can also create your own organization roles with a precise set of permissions and assign them to members.
Key concepts
Section titled “Key concepts”Roles are named bundles of permissions. Oneleet ships two kinds:
- System roles — predefined roles managed by Oneleet (for example Admin, Member, and Auditor). Every member receives them automatically based on their workspace role and account type. System roles can't be edited or deleted, but you can duplicate one to use as the starting point for your own role.
- Organization roles — roles your organization defines. You choose exactly which permissions they grant, and you control which members hold them.
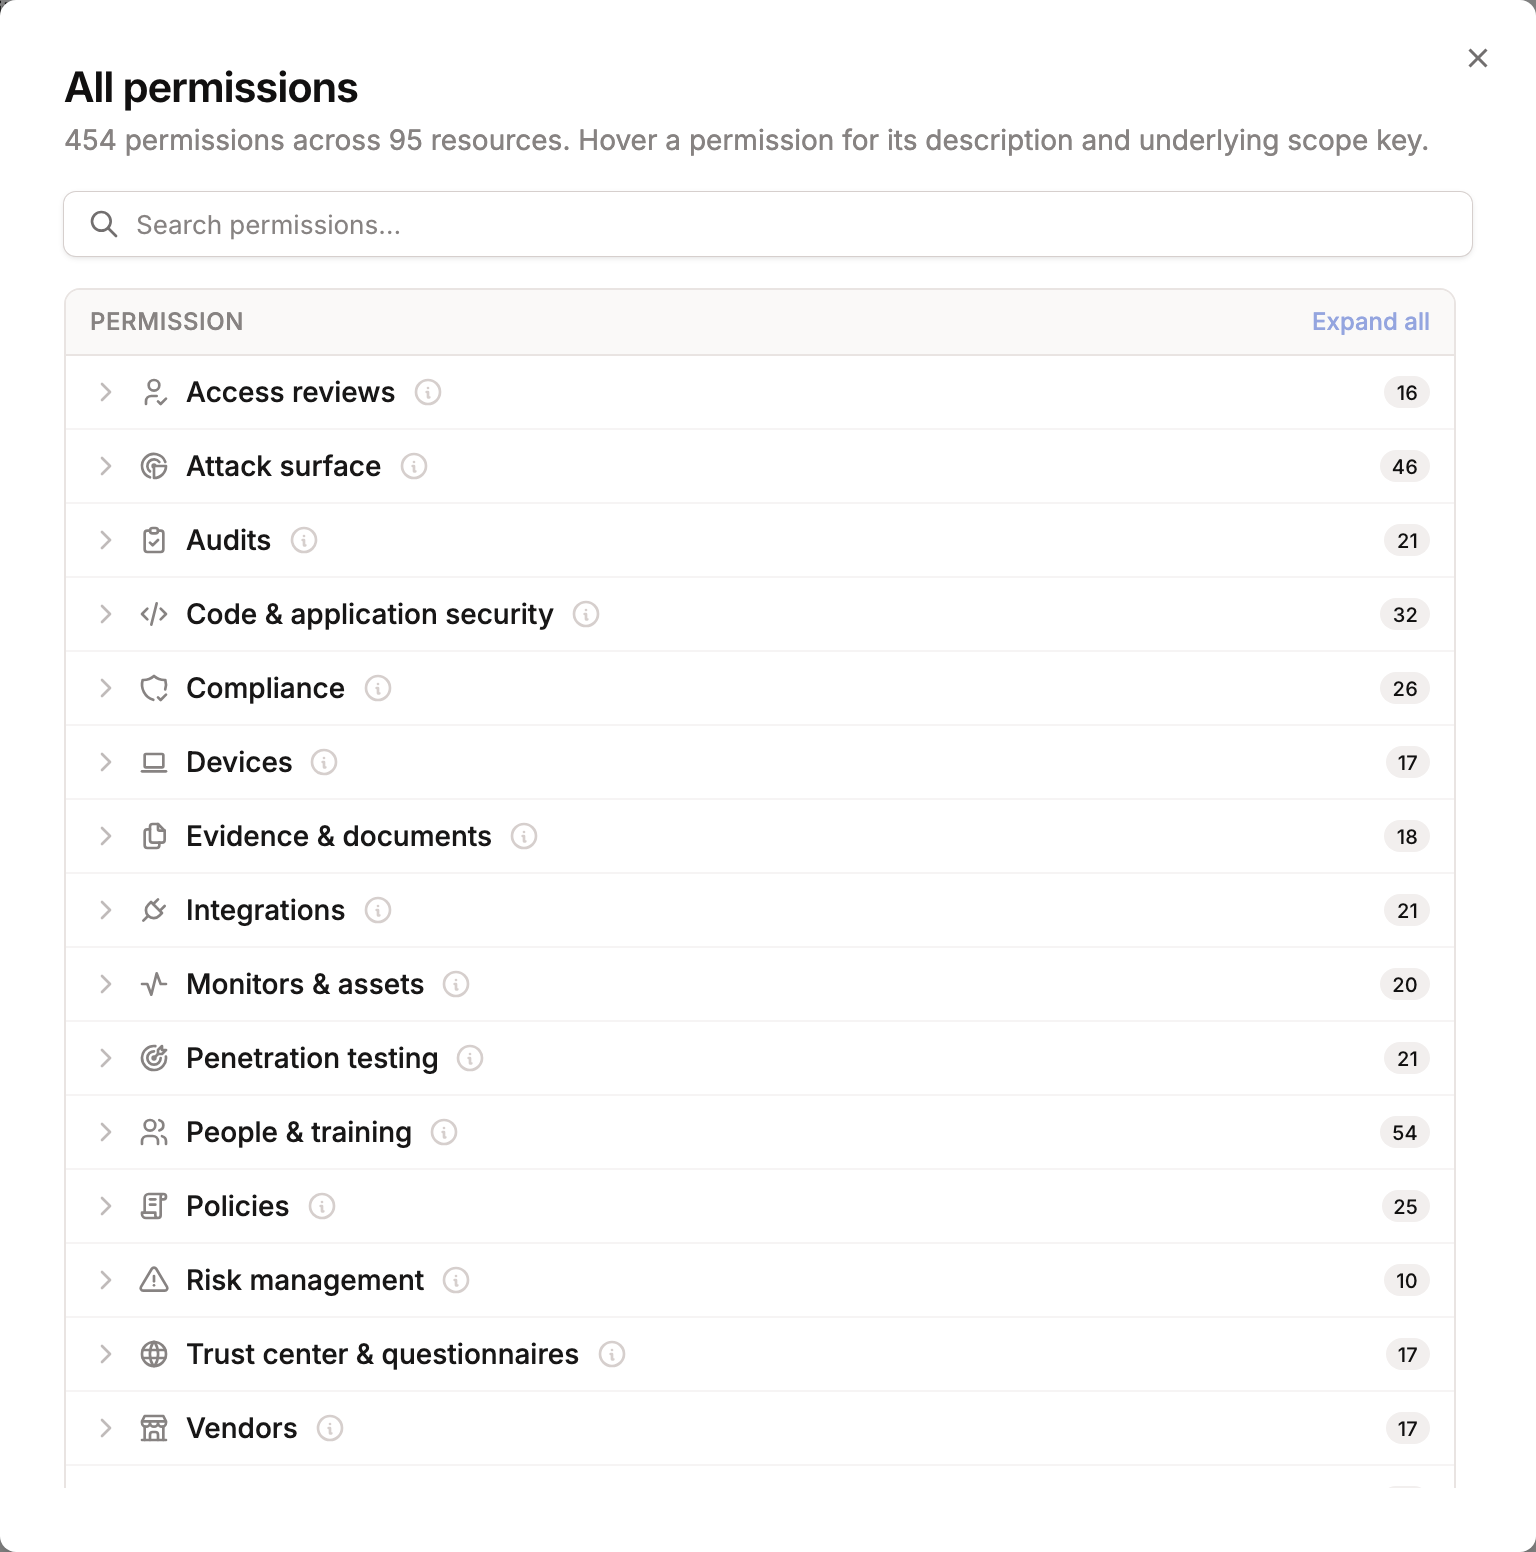
Permissions are individual read or write actions on a resource — for example "list controls," "create evidence," or "bulk update attack surface findings." Permissions are grouped by product area (Compliance, Evidence & documents, Integrations, and so on) and, within each area, split into Read (view and list access that never changes data) and Write (create, update, and delete access).
Opening the role editor
Section titled “Opening the role editor”-
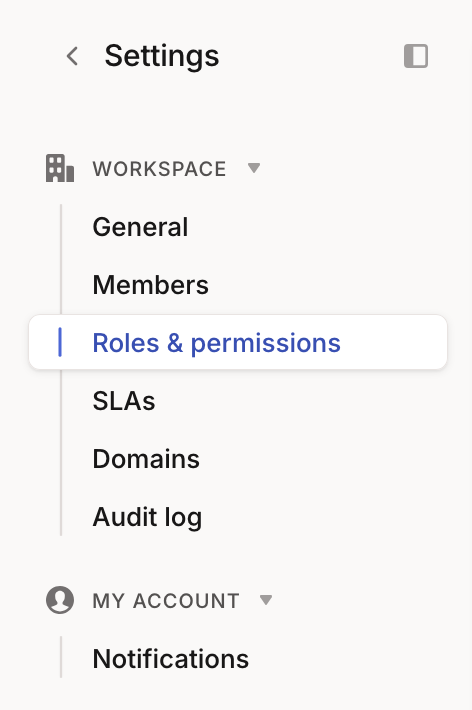
Click Settings in the left navigation, then open Roles & permissions under the Workspace section.
-
The role editor opens on the Role-based access control page. System roles are listed at the top; organization roles are below.
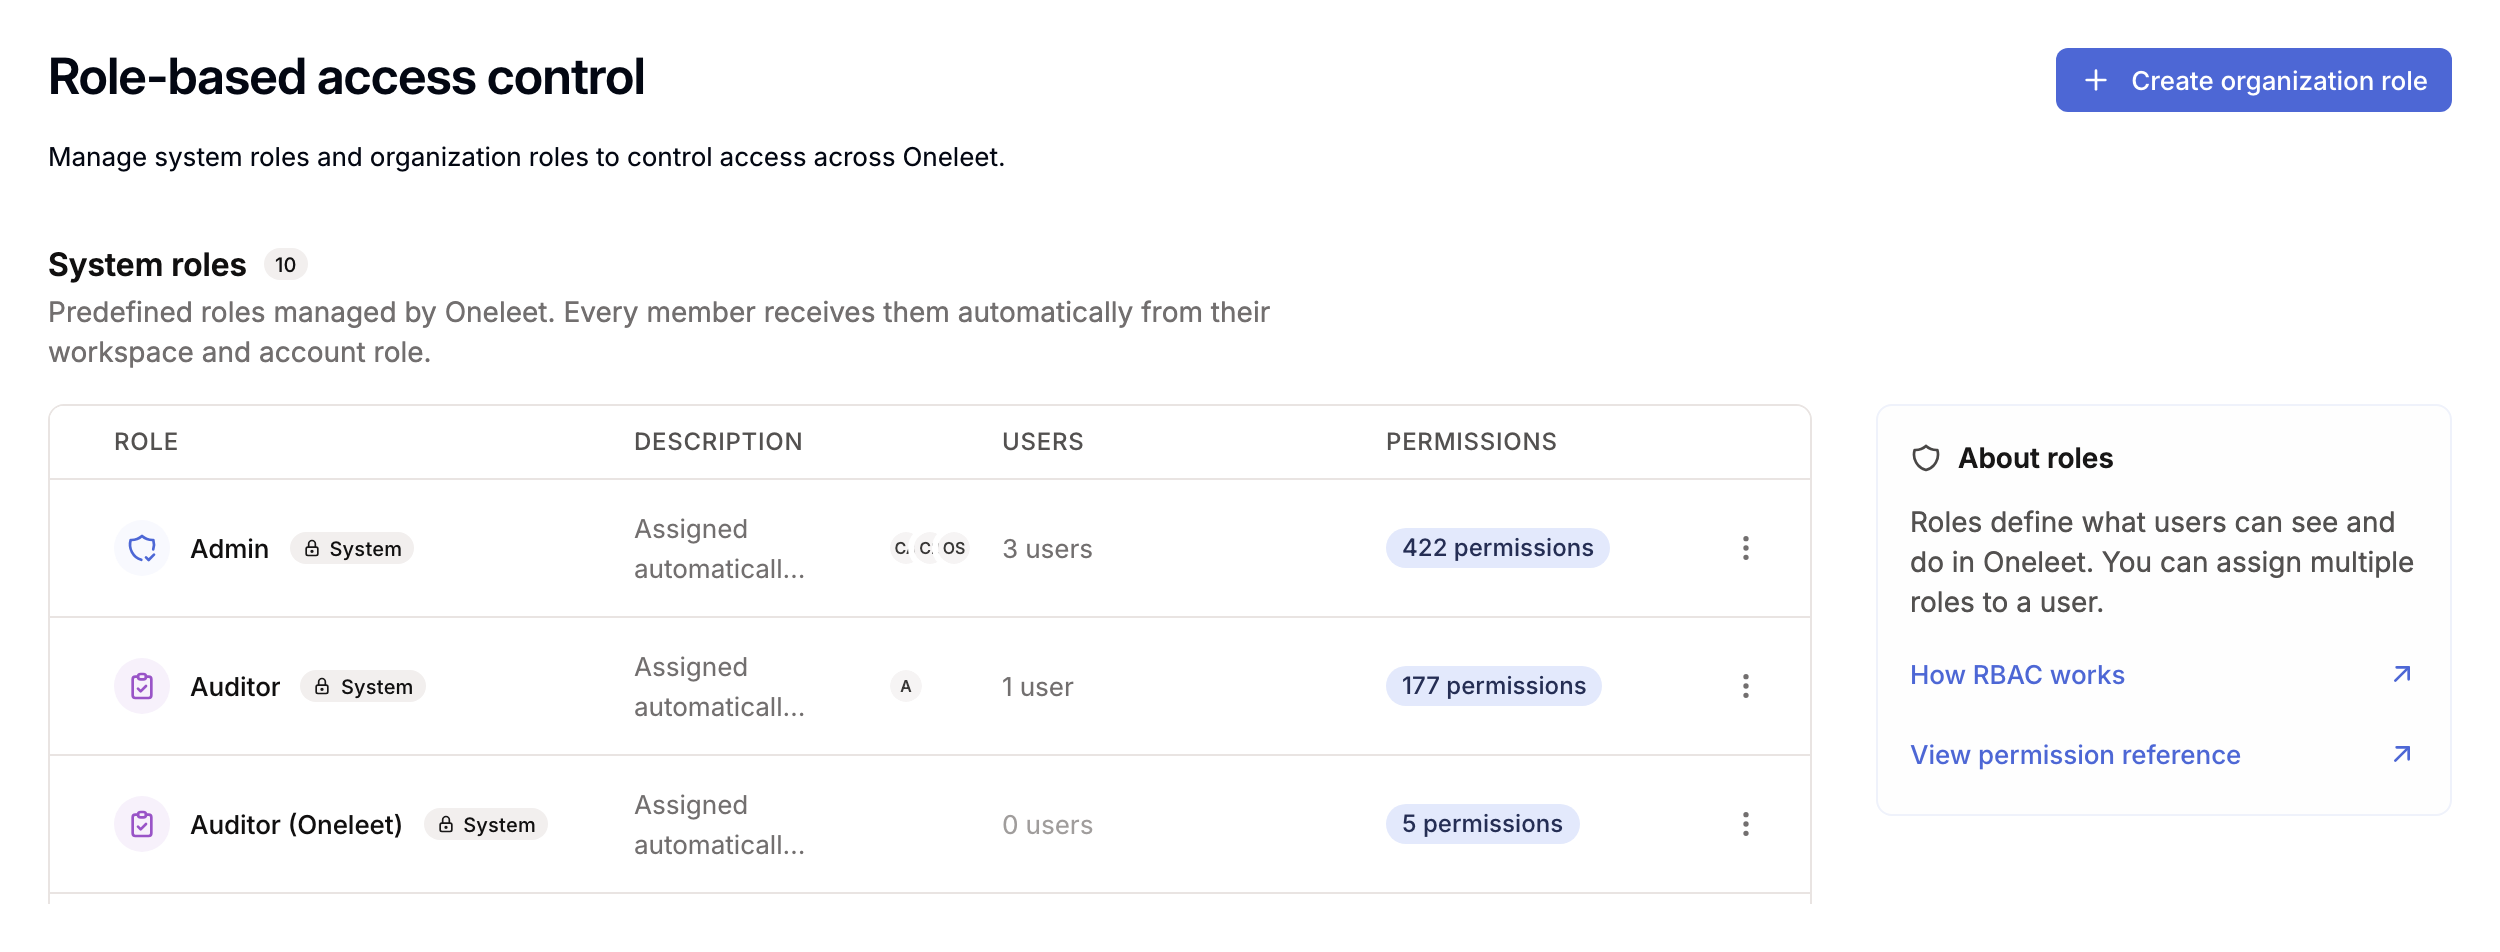
Reviewing system roles
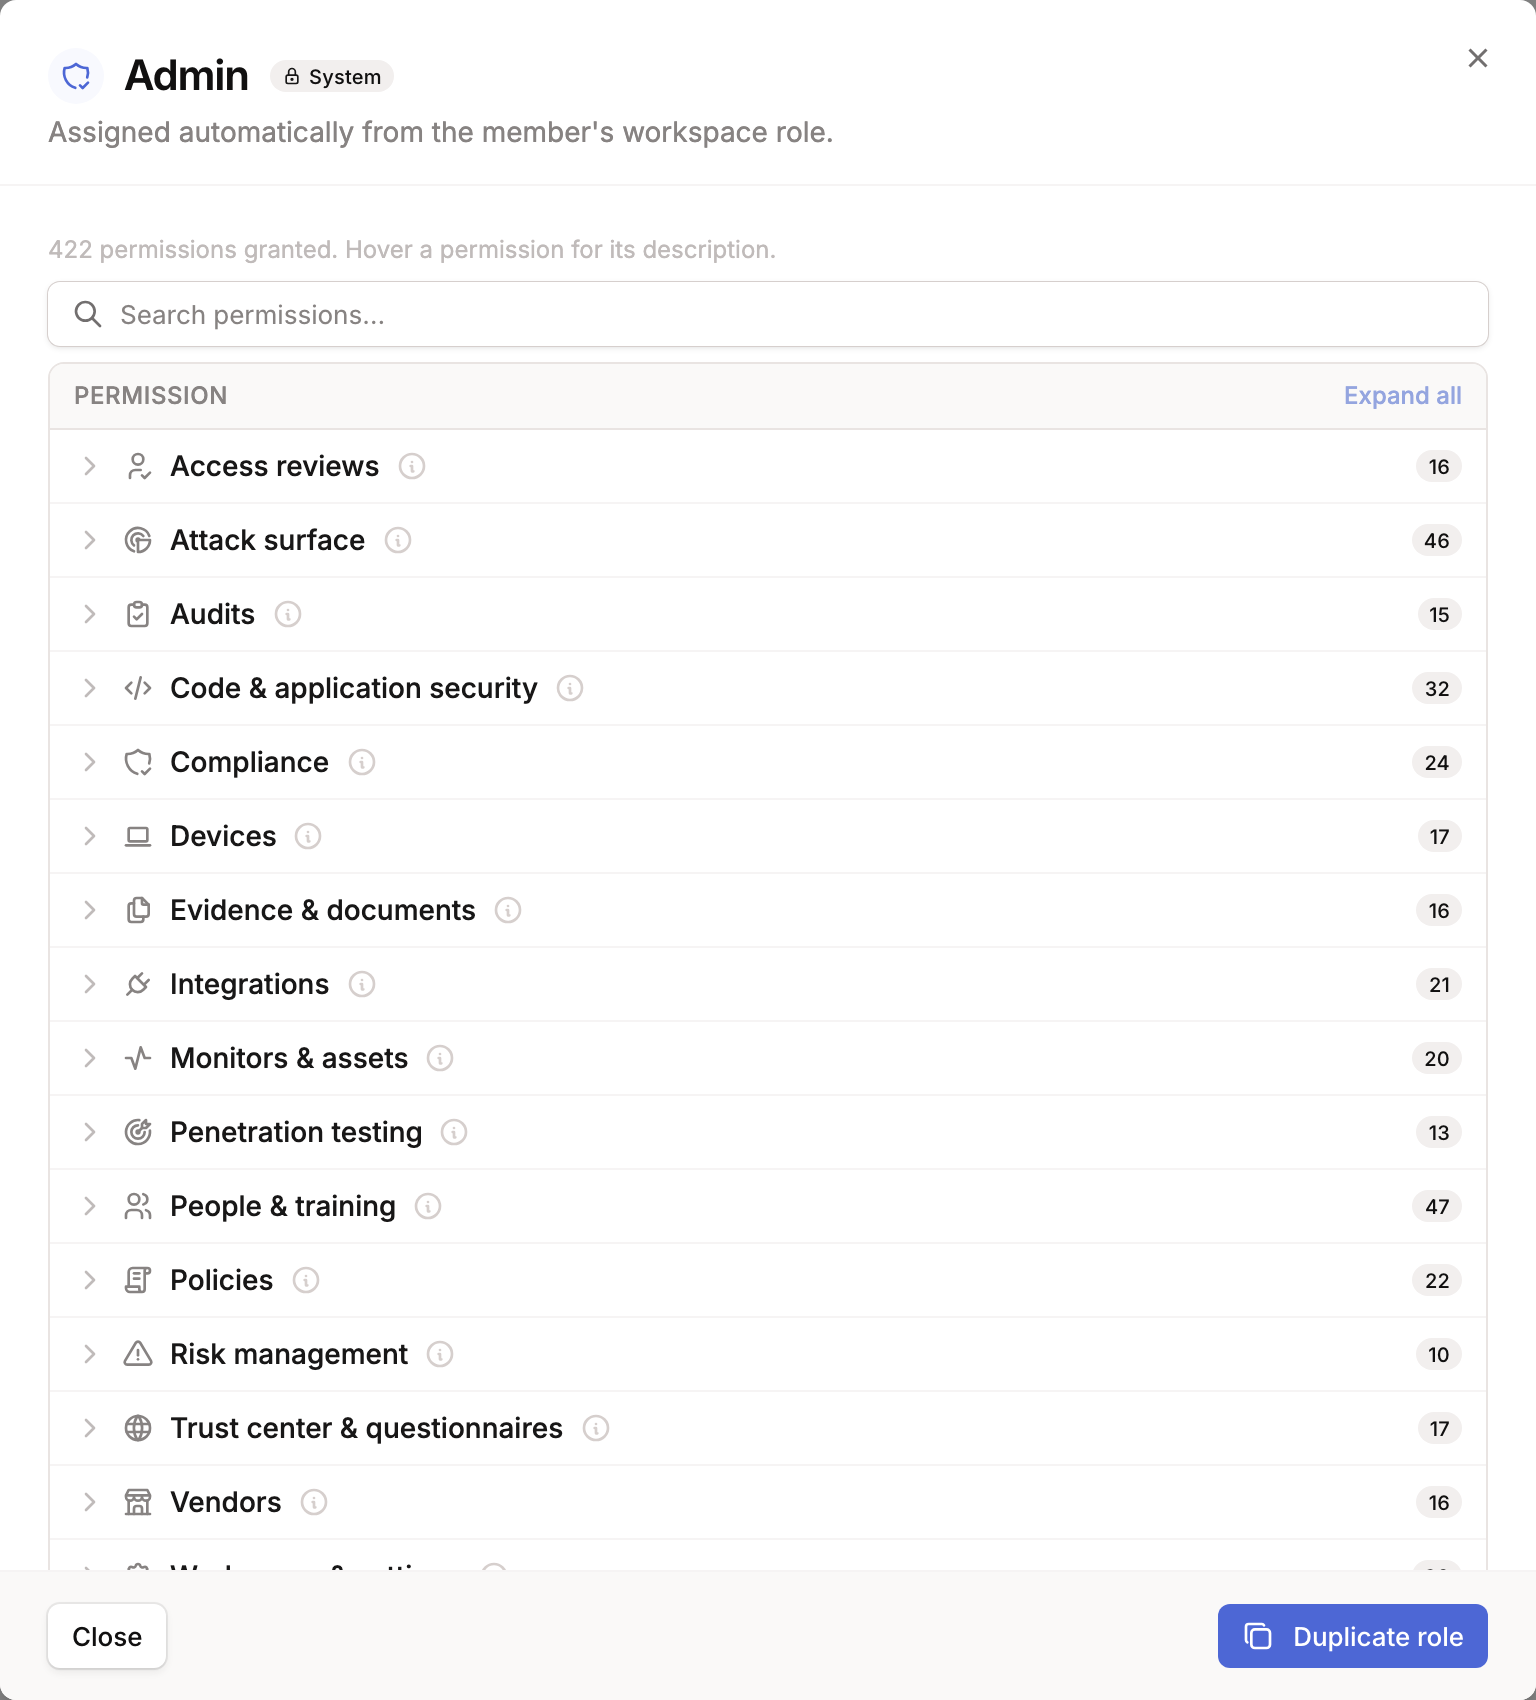
Section titled “Reviewing system roles”Click any system role to see exactly what it grants. The view is read-only — permissions are grouped by product area, and you can hover the info icon on any permission for a description and its underlying scope key.
The About roles panel, beside the system roles, links to this guide and to a full permission reference.
Click View permission reference to browse every permission Oneleet supports, grouped the same way as in the editor. Hover the info icon on any permission for a description and its underlying scope key.
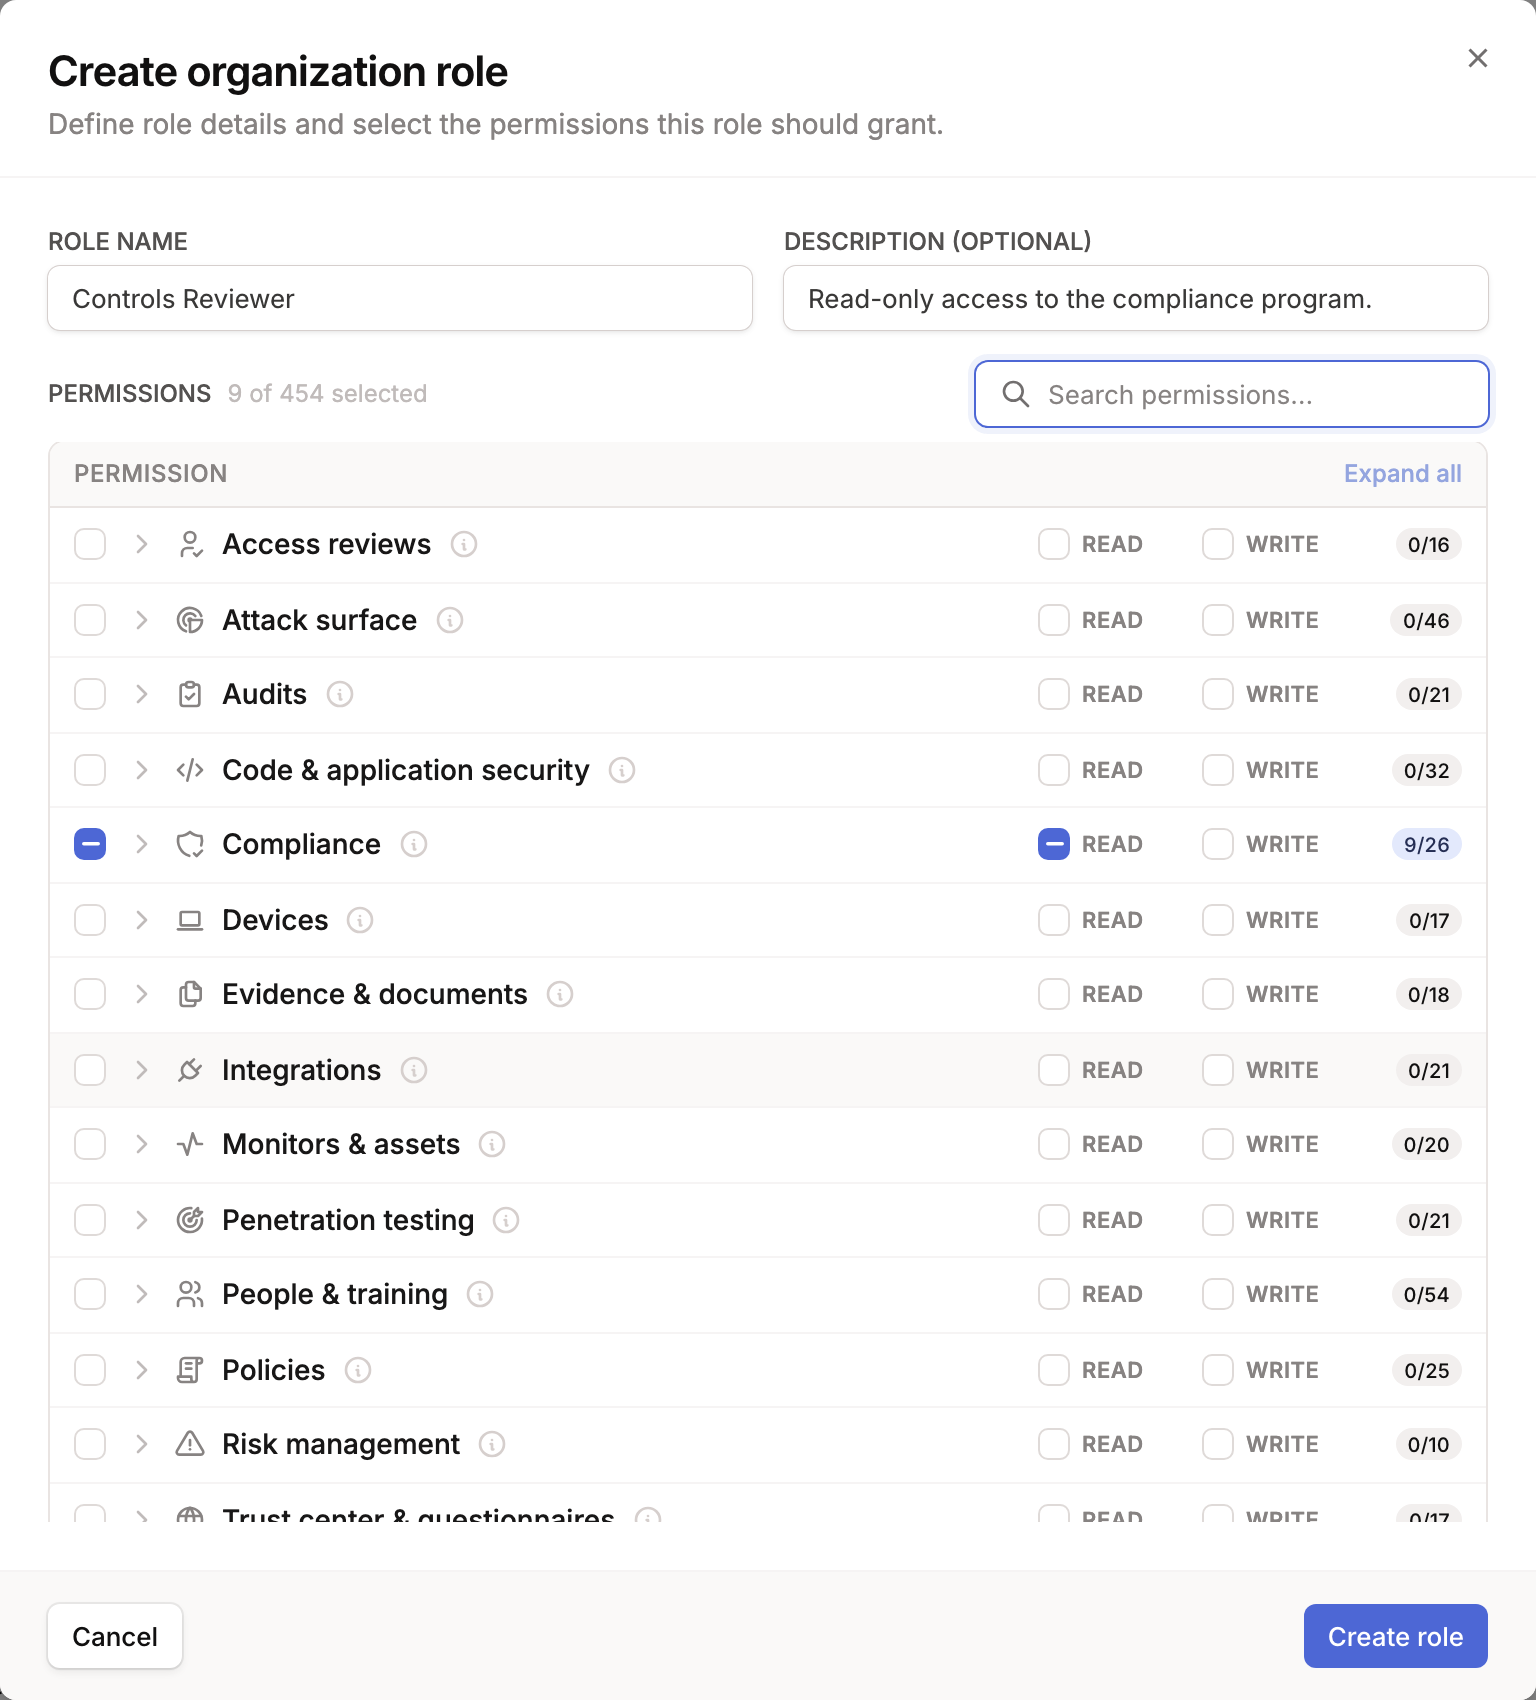
Creating an organization role
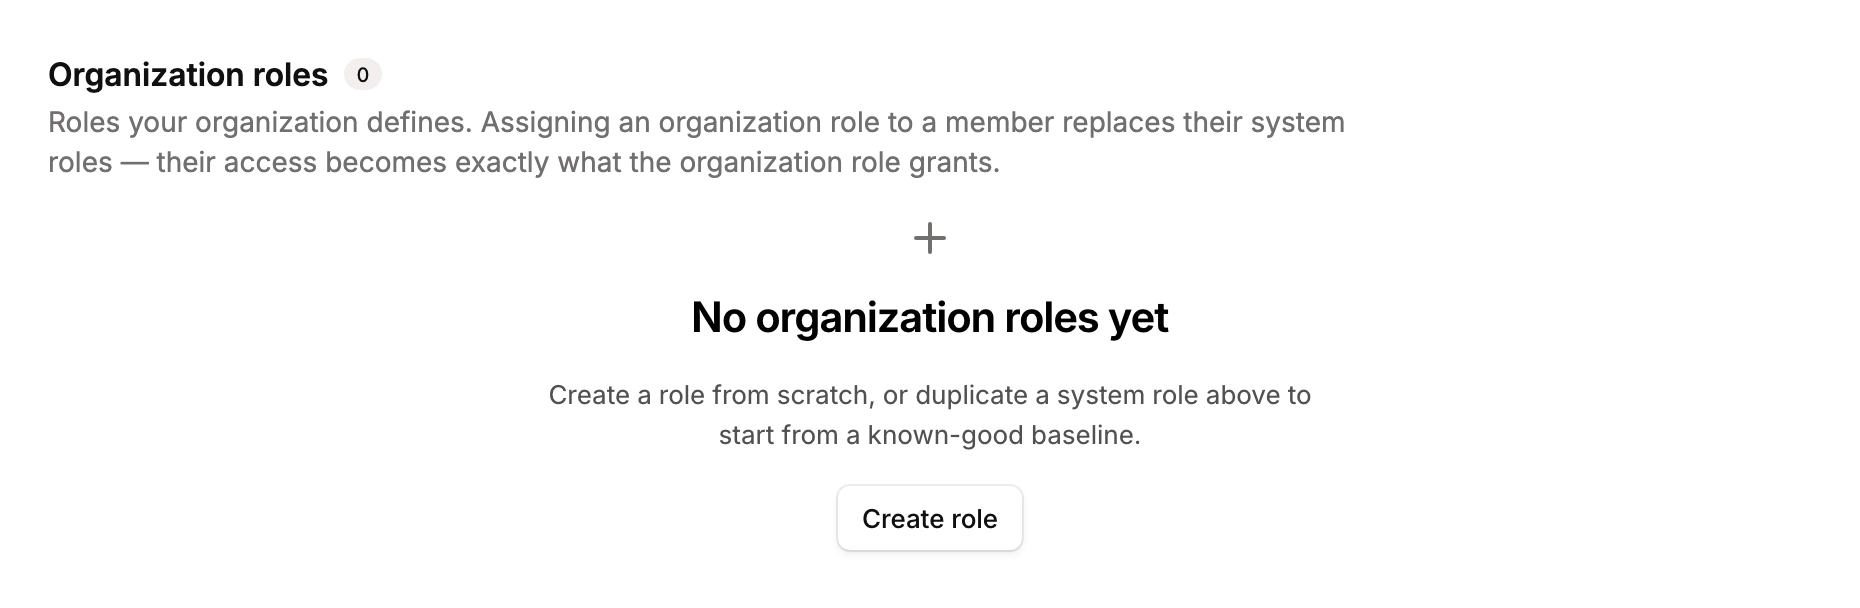
Section titled “Creating an organization role”A workspace starts with no organization roles — create your first from scratch, or by duplicating a system role.
-
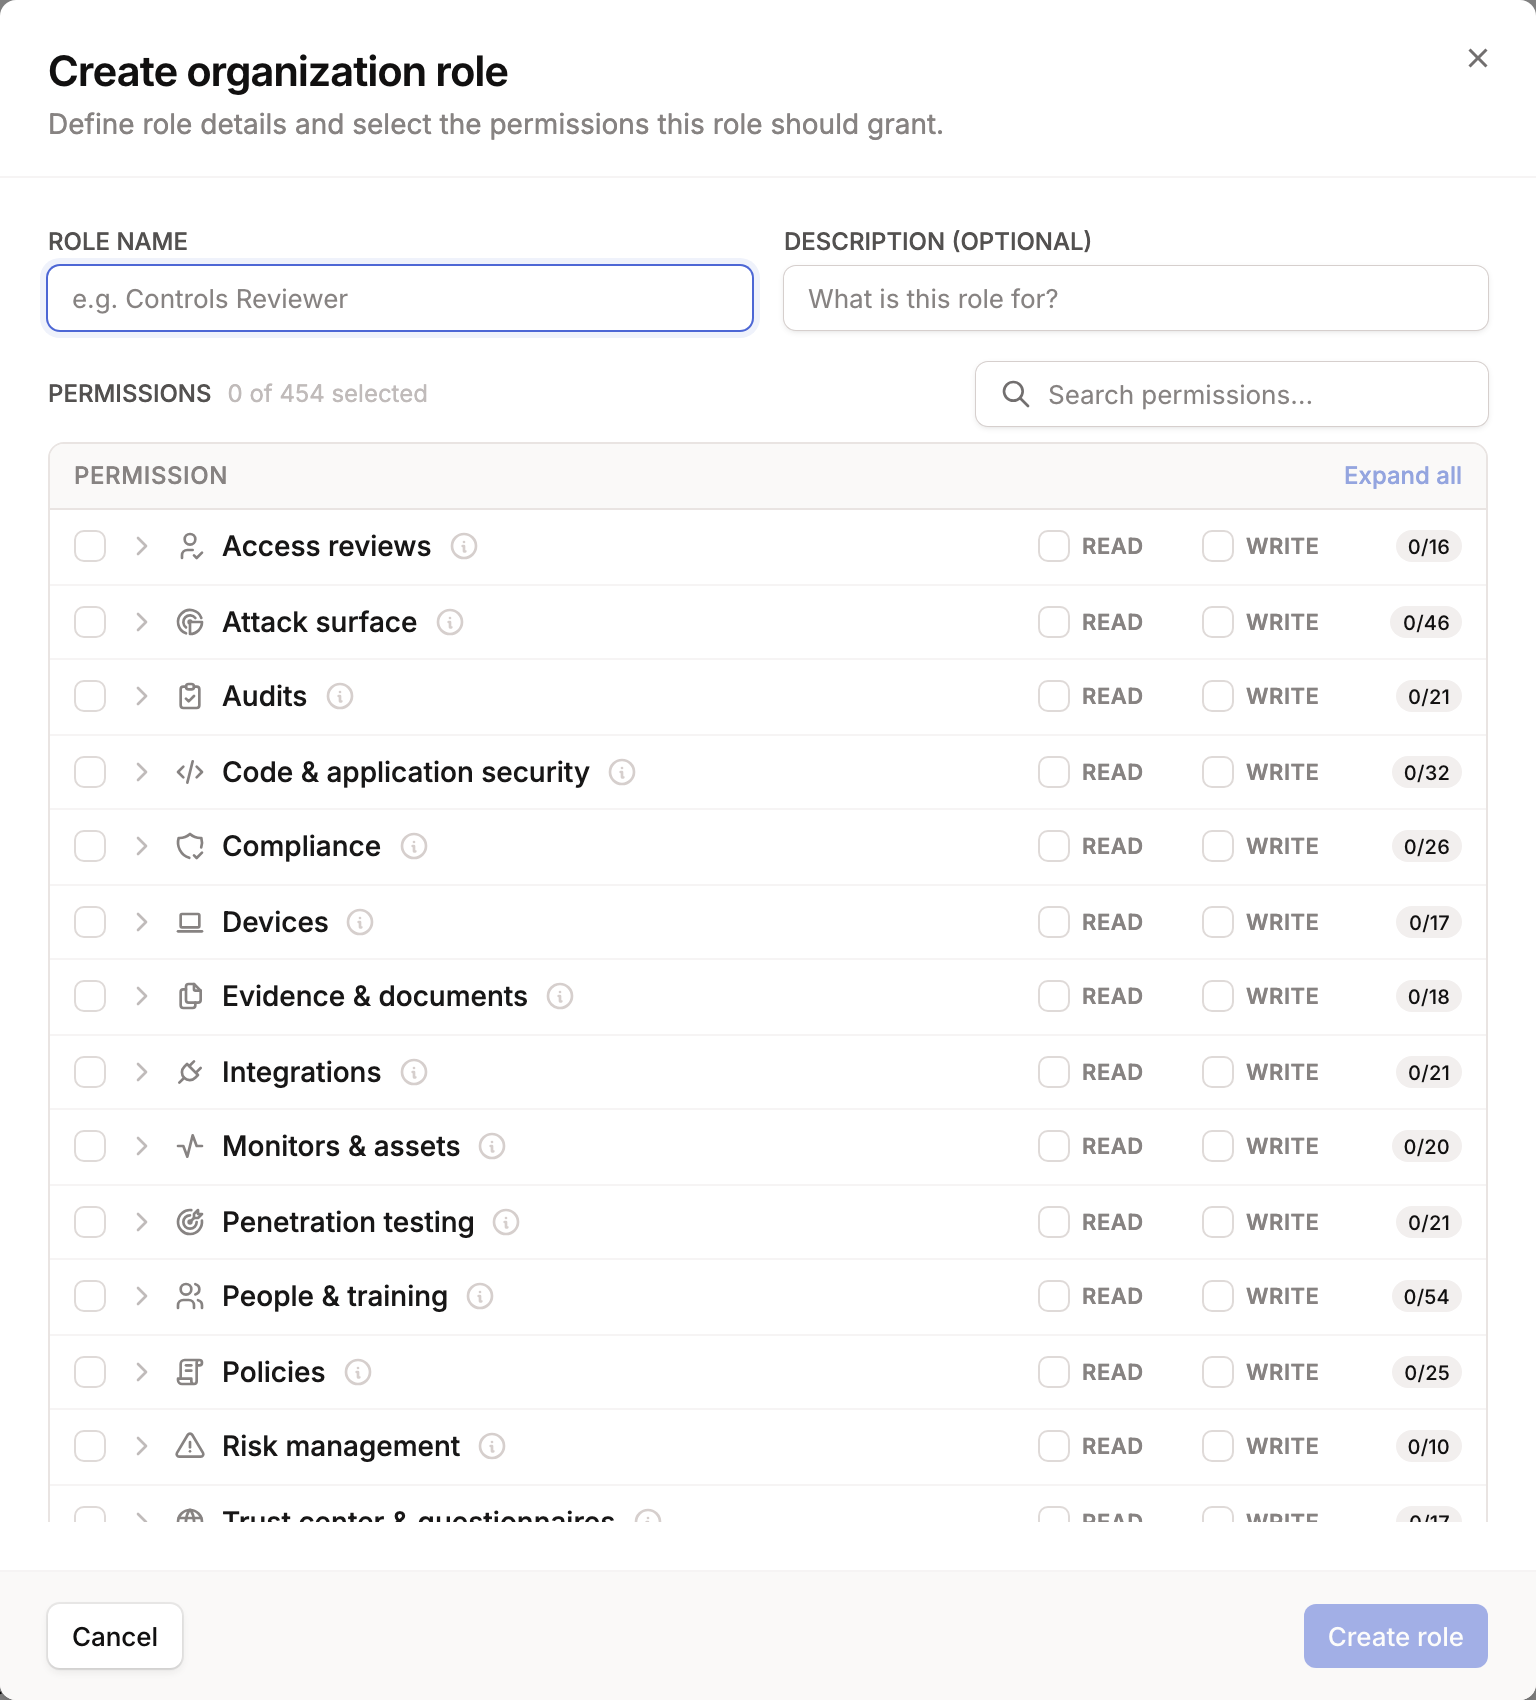
Click Create organization role in the top-right of the page. The role editor opens with an empty permission tree.
-
Give the role a name and an optional description.
-
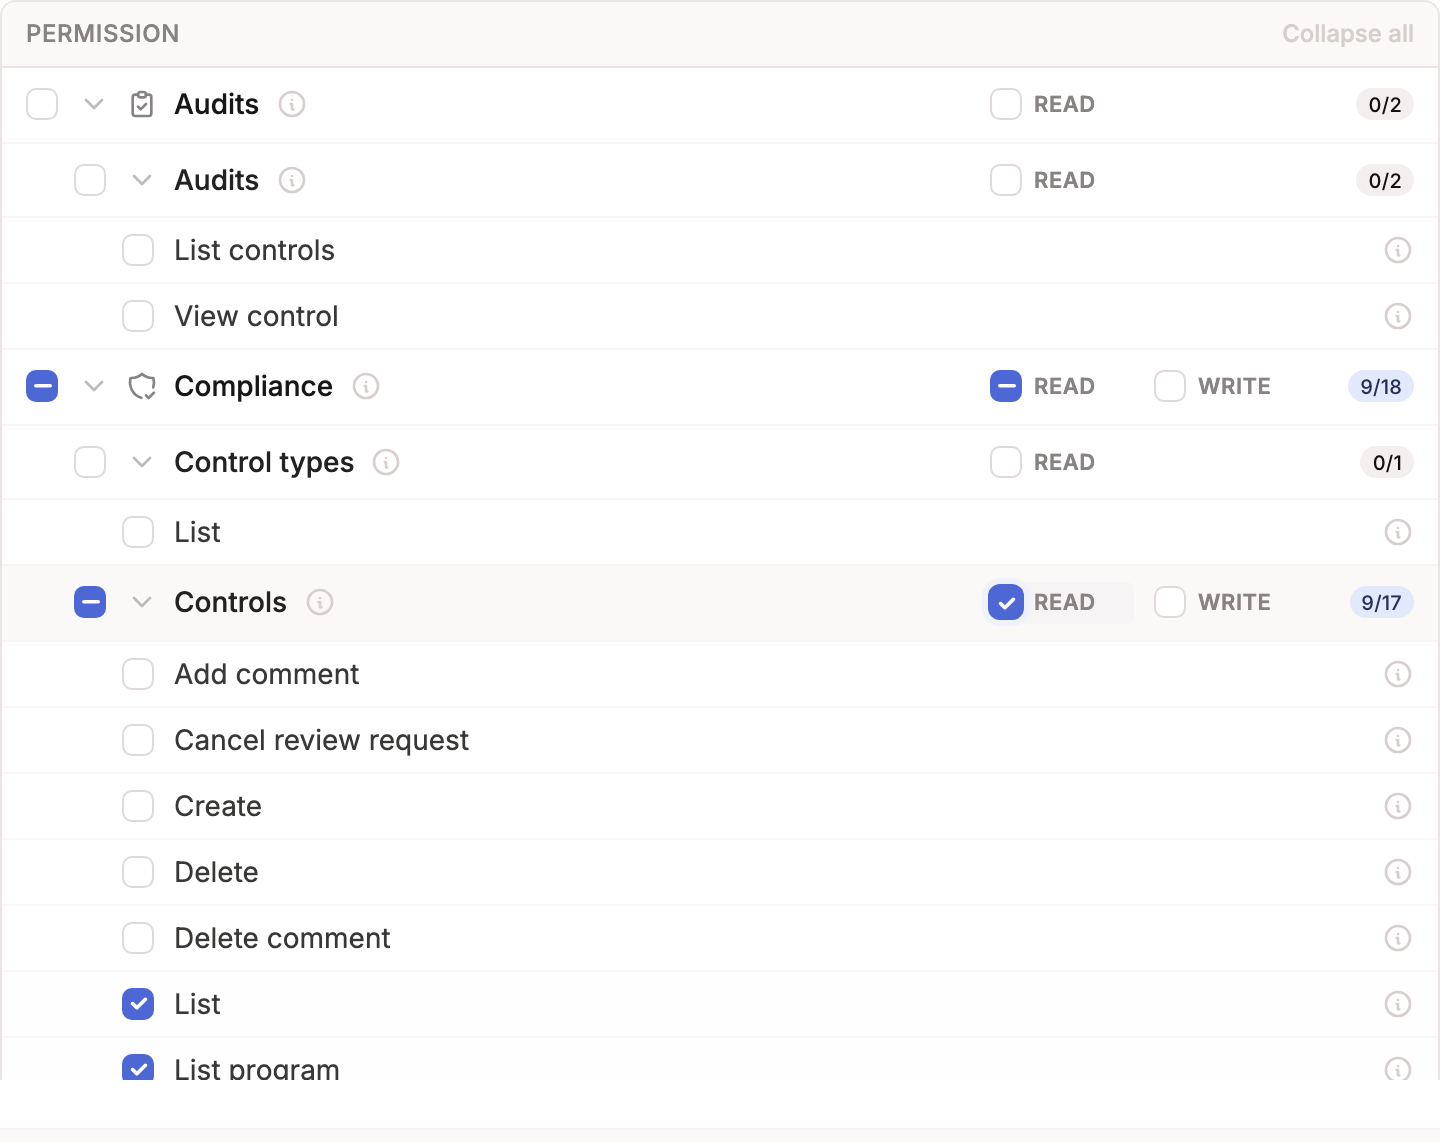
Select the permissions the role should grant. Expand a product area to see its resources, and use the inline Read / Write checkboxes to grant all of an area's or a resource's read or write permissions in one click — or expand a resource to pick individual permissions. The count badge shows how many of each group's permissions are selected.
-
The header shows a running total of selected permissions. When you're happy with the selection, click Create role.
-
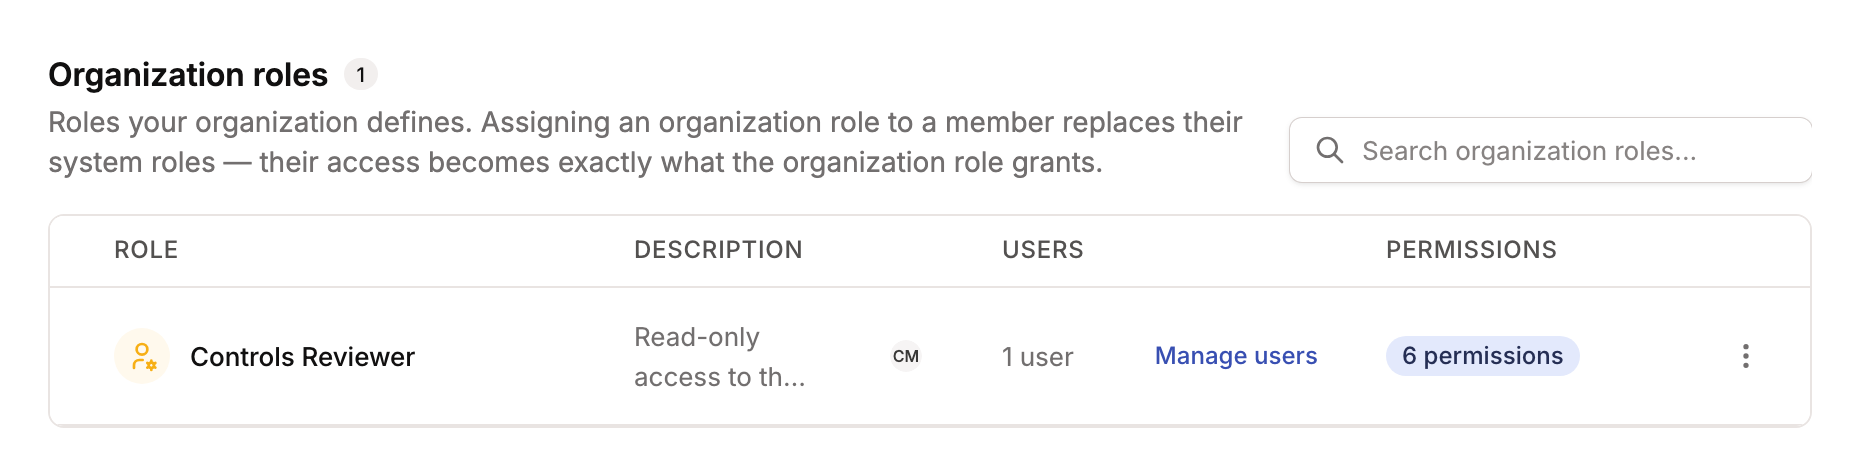
The new role appears in the Organization roles table with its description, assigned members, and permission count.
Starting from an existing role
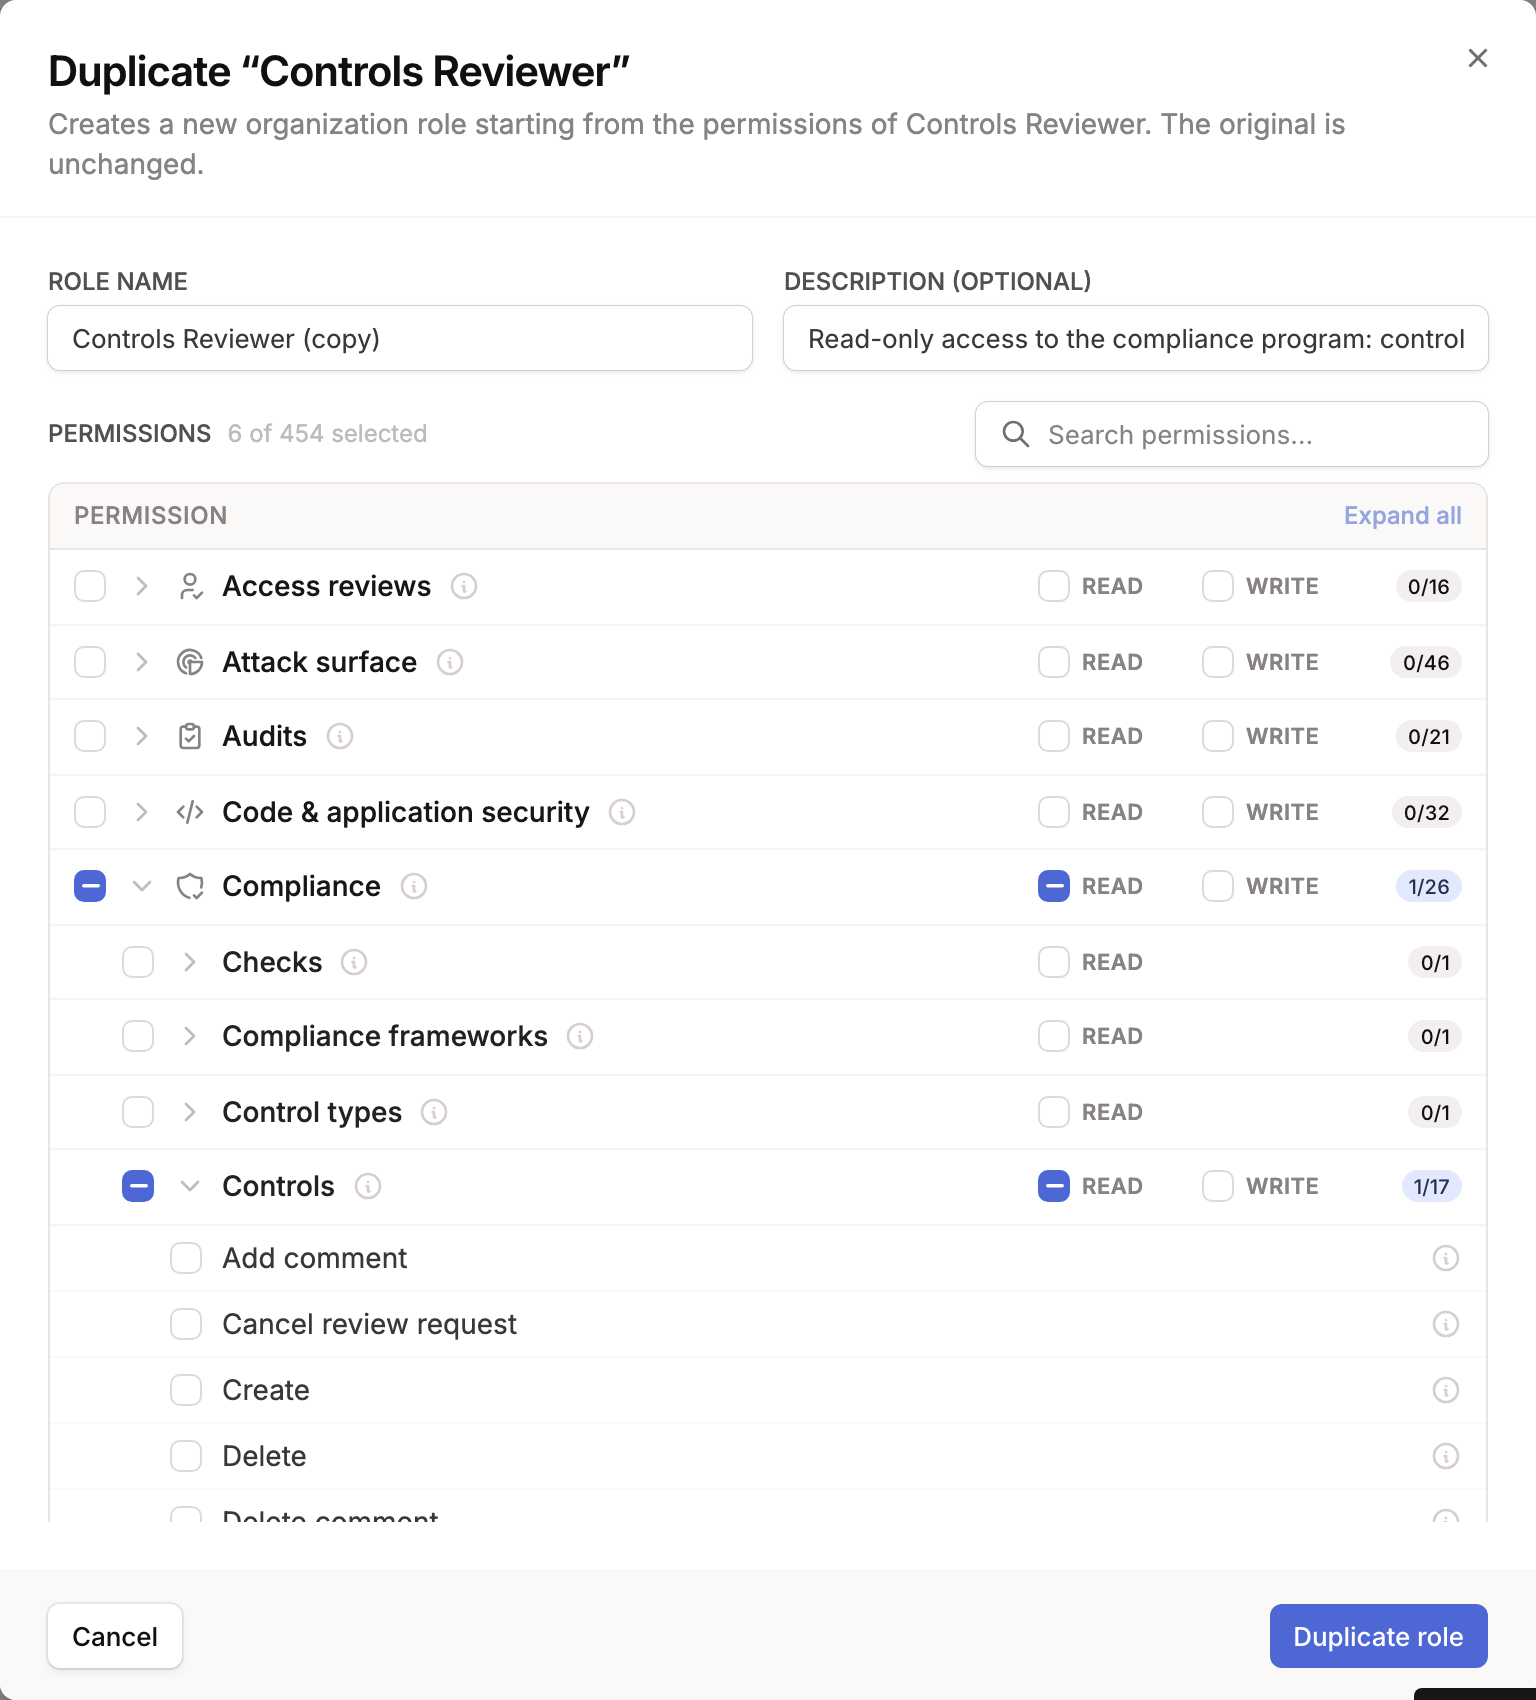
Section titled “Starting from an existing role”Instead of building a role from scratch, you can duplicate a system role (a known-good baseline) or another organization role. Open a role's ⋯ menu — or click Duplicate role while viewing a system role — and Oneleet pre-fills a new organization role with the source role's name and permissions, which you can then adjust. The original role is never changed.
Editing and deleting a role
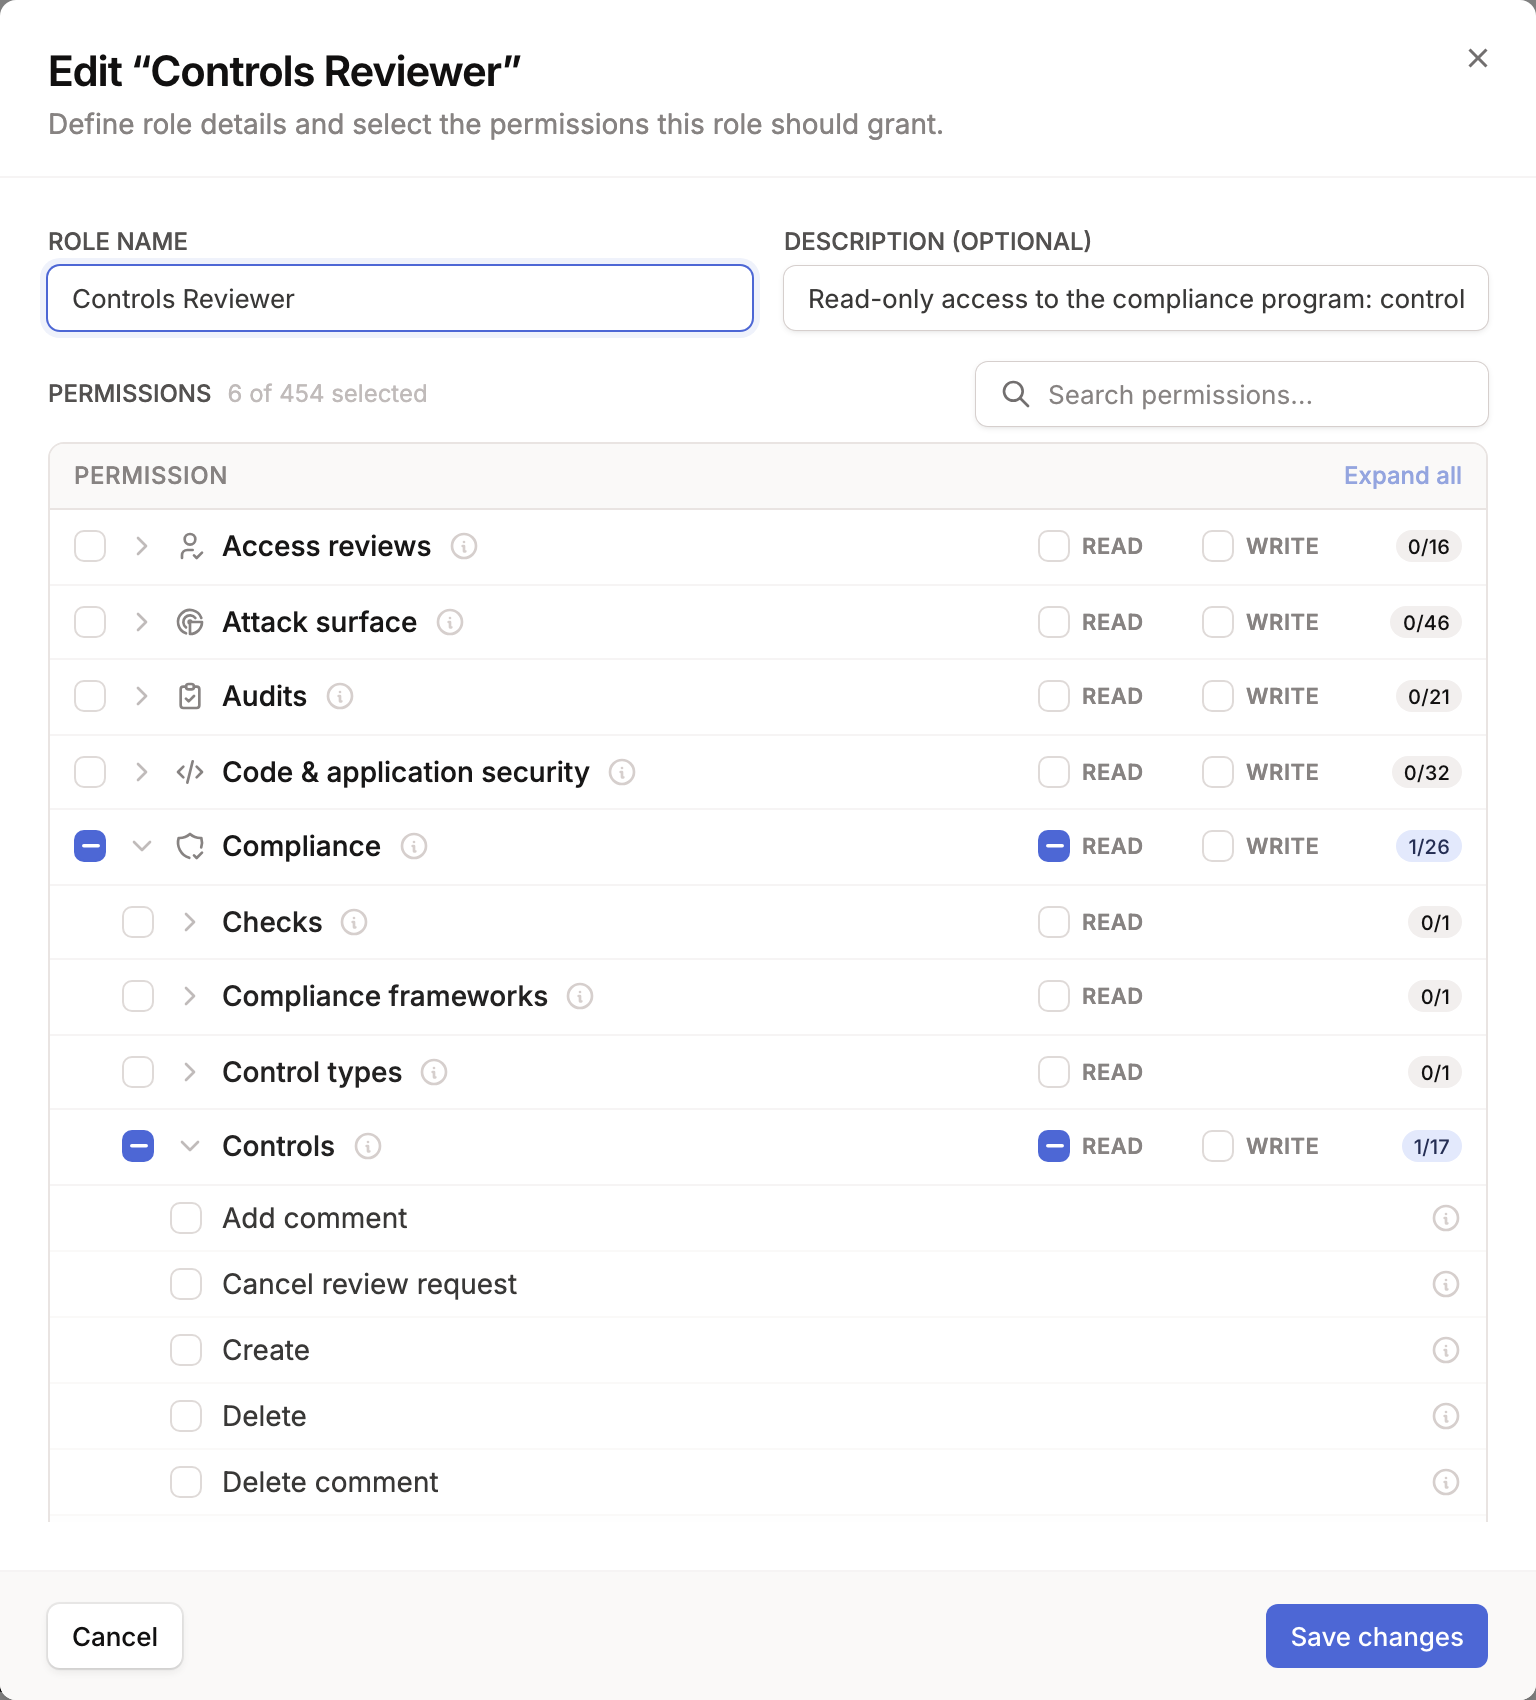
Section titled “Editing and deleting a role”Click an organization role (or choose Edit from its ⋯ menu) to change its name, description, or permissions.
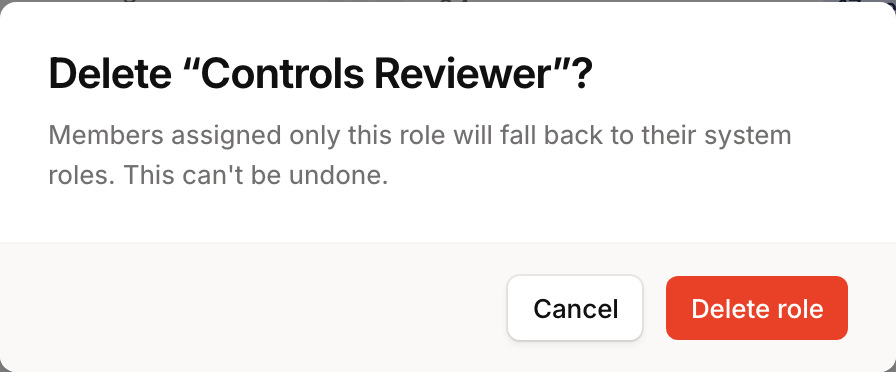
Choose Delete from a role's ⋯ menu to remove it. Deletion can't be undone, and any member assigned only that role falls back to their system roles.
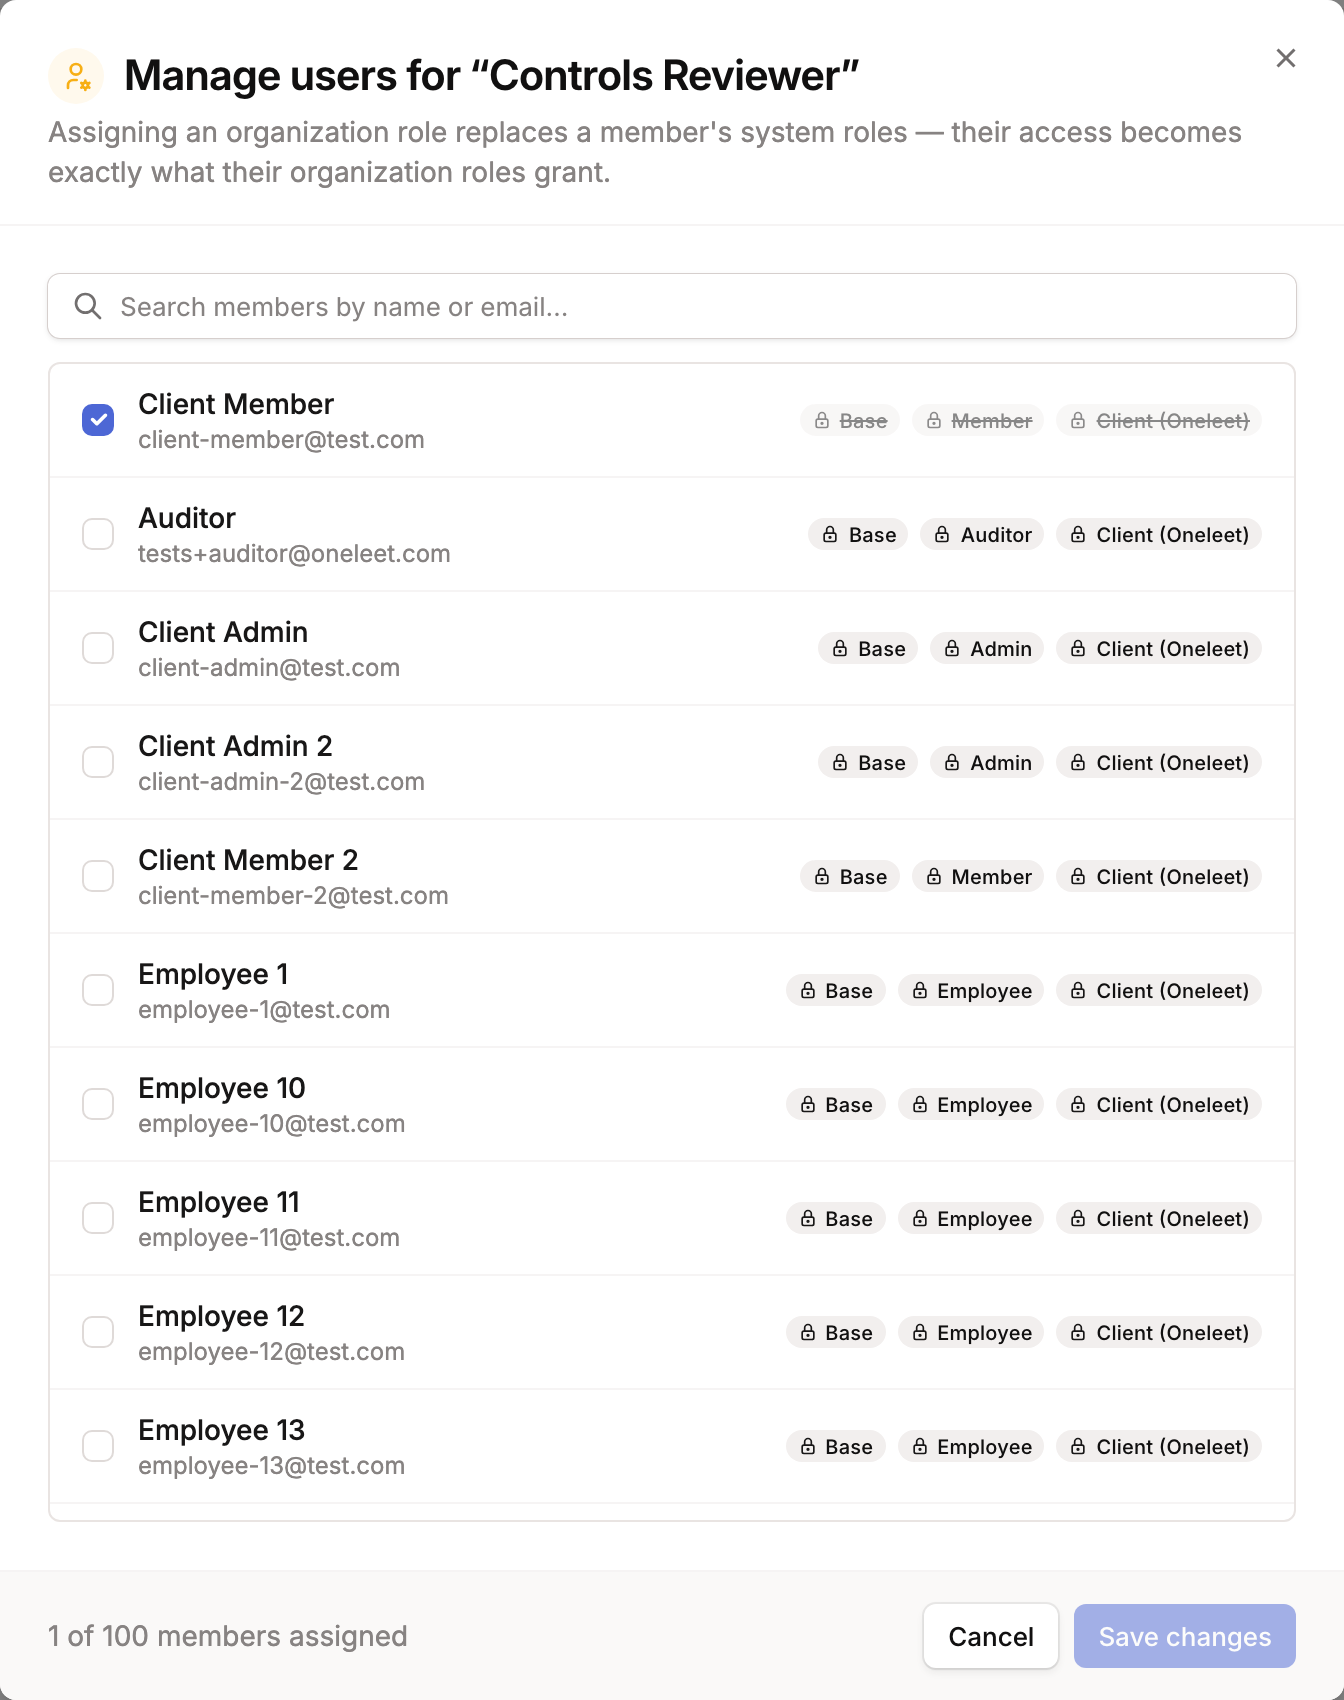
Assigning roles to members
Section titled “Assigning roles to members”Click Manage users on an organization role to choose which members hold it. Check a member to assign the role, or uncheck to remove it, then click Save changes.
Because organization roles replace system roles, a member's system-role chips are shown struck through as soon as they'd hold at least one organization role — a live preview of the access they'll have after saving.
How access is enforced
Section titled “How access is enforced”RBAC is enforced on the backend, so permissions hold no matter how a member reaches your data — the dashboard, the API, or an MCP client all go through the same checks.
- Checked on every request. Each API call is authorized against the caller's effective permissions — the union of every role they hold in that workspace.
- Read vs. write. Read permissions only allow viewing and listing; they can never change data. Write permissions allow creating, updating, and deleting.
- Workspace isolation. Roles and assignments belong to a single workspace. A role and its members can never grant access to another workspace's data.
- System roles replaced by organization roles. When a member holds any organization role, their system roles stop applying and their access is exactly what their organization roles grant. Removing all of a member's organization roles restores their system roles.
- Some permissions can't be delegated. Sensitive internal operations are reserved and can't be added to an organization role, so a custom role can never be used to escalate beyond what your workspace admins can grant.
- Oneleet staff are separate. Oneleet's own internal roles (such as support and pentest staff) are managed by Oneleet and are not part of your workspace's roles. Your organization roles only ever affect your own members.
- Changes are audited. Creating, editing, or deleting a role, and assigning or removing a member's roles, are recorded in your workspace Audit log (Settings → Audit log).
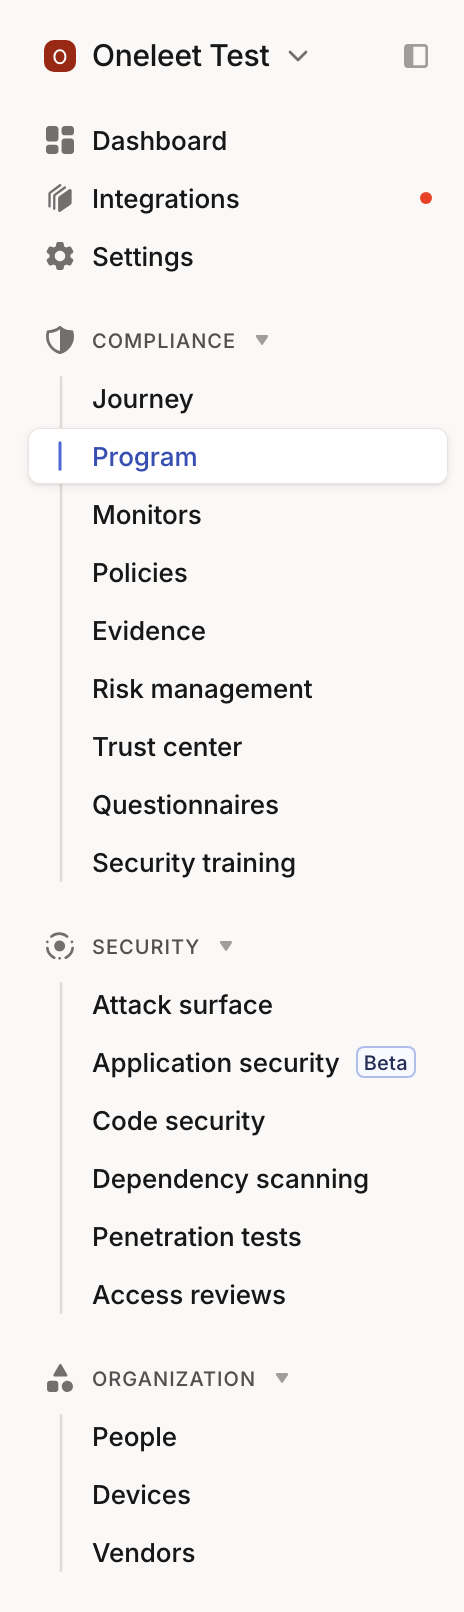
The interface adapts to permissions
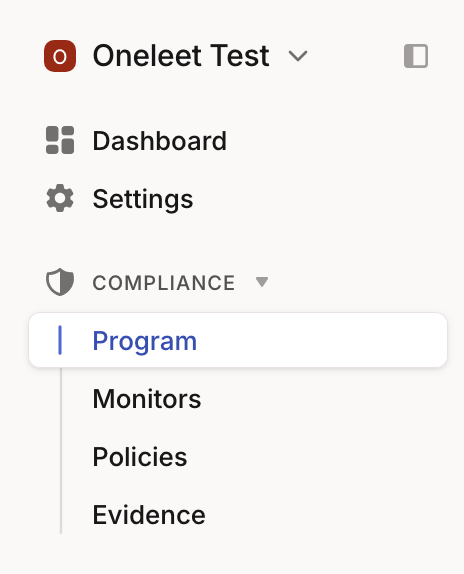
Section titled “The interface adapts to permissions”The product also reflects a member's permissions in the UI: the left-hand navigation only shows the sections a member can actually use. A member assigned an organization role sees just the areas that role grants, while a workspace admin sees everything.
For example, a workspace admin sees the full navigation:
A member assigned a read-only "Controls Reviewer" organization role — granting only the compliance program, monitors, policies, and evidence — sees a much narrower navigation, with administrative and unrelated sections hidden:
At a glance
Section titled “At a glance”| Topic | Detail |
|---|---|
| Who can manage | Workspace admins |
| System roles | Predefined by Oneleet, assigned automatically, read-only (duplicate to customize) |
| Organization roles | Defined by your workspace; any combination of read/write permissions |
| Multiple roles | A member can hold several organization roles; access is the union of them |
| Override rule | Any organization role replaces a member's system roles until every organization role is removed |
| Scope | Roles and assignments are isolated to one workspace |
| Enforcement | Checked on every request (dashboard, API, and MCP) |
| Auditing | Role and assignment changes appear in the workspace Audit log |